Looking for tips on how to stay safe hiking this summer? Look no further. You are in the right place! Today we are going to talk about how to prevent injuries while hiking with regards to your body, your equipment and although not physio related…wildlife.
Hiking Form and Warm-up
It is always prudent to find out information like current conditions, weather, difficulty rating, bear closures etc.; about the trail prior to leaving. When you get to your desired trailhead check the trailhead map and other posted advice/warnings. Easy warm up stretches and starting slow is always a good idea. Remember to “be bold and start a little cold” as you would warm up fast.
Make sure you take it slow through rough terrain. One of the most common injuries is to the shoulder/knee when hikers to trip and fall. Tripping on a root or a log causes you to try and break your fall and you can easily strain your rotator cuff muscles. Take it slow and watch your footing!
Hiking Equipment and Posture
When going for a hike (especially longer ones), learn how to pack your backpack properly. You don’t want it to be too heavy and risk straining your back, although make sure you bring lots of water, especially on hot days. Make sure you cinch the hip strap on your backpack as the weight of the pack should be resting on your hips and not your shoulders or back. This will reduce the chances of a back strain and also take some of the weight off of your shoulders.
Having a properly fitted backpack also helps with ergonomics and posture. Make sure to carry the heavier weight at the bottom of the pack and close to your back. Don’t put your heavy items at the top of the bag as this will allow it to sway back and forth which increases the chance of injury. Hike with your back straight, shoulders back and head up. A lot of people with bad posture will start feeling pain in the upper back between the shoulder blades.
What other hiking equipment can you use to help prevent injuries and falls? Hiking poles! They help distribute body weight and prevent loading your knees and hips predominantly. Hiking poles reduce weight transfer through the joints, especially the knees and hips. They also assist you going uphill and downhill and provide a wider base for your centre of gravity. Another bonus? They help reduce the risk of a fall by giving you better balance. You don’t want to trip and potentially injure a shoulder, leg or back muscle. Hiking poles are almost like an extra set of legs, so use them!
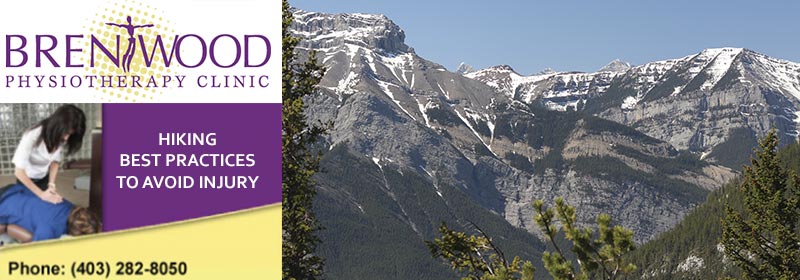
Hiking in the Canadian Rockies
Lastly, we wanted to touch on something we see a lot of in Canada, wildlife! Although not physiotherapy related it is still important to the safety of your group. The first thing to bring with you? Bear Spray. Your voice and friends are added protection. Studies have shown that hiking in groups of 4 or more can avoid hiker/bear close encounters.
Bring one at least canister of bear spray/repellant for each hiker. Hopefully, you won’t ever see a bear out on your hike and have to use the spray. Also make sure that your approach can be heard (talk/clap or call out loudly intermittently) especially in smaller groups. Bear bells have been found to be ineffective and are also an irritant to other hikers. (Bears too, if I was one!). A whistle can be used to make your approach known. Remember, 2 blows to let your presence be known. 3 blows are a sign of distress/ request for help. This will keep the bears aware of your location so that they keep away from you. Remember, we are in their territory.
Where should you go hiking?
So where are you planning your next trip in the Rockies? Bragg Creek or Kananaskis? Take a look at the list below of some of our favourite hikes and locations here in Alberta. Get out into nature and enjoy the weather this summer! As always stay safe and take precautions to prevent injuries. If you have any concerns or questions give us a call and we will be happy to help.
-
Prairie Mountain
This hike is near Bragg Creek in the Elbow River Recreation Park. It has a nice lookout at the top where you can see the city of Calgary. The hike is pretty short, although the beginning is pretty steep. The trail then levels off as you turn right across the ridge. At the top, you will find a big pile of rocks with a Canadian Flag planted right in the middle, a good photo opportunity! The hike is considered “difficult” on some sites but that is probably an overstatement. A great hike for spring or fall as the trail is usually pretty clear. Bring your jacket as it tends to get pretty windy at the top.
Length: 6 km
Time Estimate: 5 hours (return)
Elevation Gain: 715 metres
Peak Elevation: 2,210 Metres
Directions: Prairie Mountain is accessed heading west from south-west Calgary on Highway 22X past Bragg Creek, on Hwy. 66 which dead ends in Kananaskis. It is important to note the final portion of Hwy. 66 is gated off between December 1 and May 15 to facilitate wildlife management (the trailhead is still accessible). The trailhead for Prairie Mountain is a short hike past parking at the gate and just prior to Beaver Flats on the opposite side of the road.
-
Jewel’s Pass / McConnell’s Ridge (Barrier Lake Fire Lookout)
Length: 13-15 km
Time Estimate: 5 hours (return)
Elevation Gain: 645 Metres
Peak Elevation: 2,030 Metres
This hike is very enjoyable and is right beside Barrier lake. You can park at the lake parking lot or further down at Widow Maker. I like to park there as it is less busy and makes the hike a little longer. Parking at the Widow Maker parking lot allows you to see kayakers hitting the river waves (if the dam lock is open). Be careful in this area as the water can rise without notice.
To start the hike walk left at the river and follow it on the left-hand side all the way to the Barrier Lake dam. Walk past the brick building and up the service road. You can also cut to the right, there is a path alongside the hill. Now you are right by the Barrier Lake parking lot – if you parked there then read from here on!
From this point by Barrier Lake, the hike is a loop, you can choose to go 2 different ways. Most people take the short way up the wider path to the right up to McConnel’s Ridge … and it’s busy during the summer. If you are short on time you can go up to the ridge and straight back down (there is a steep rocky section to navigate through) or you can loop the other way around to Jewel’s Pass. I prefer to go the opposite way around by taking the left path beside the lake (you can even walk on the beach). This takes you through Jewel’s Pass first and then to the Barrier Lake Fire Lookout area. Once you get through all the trees you will make it to McConnel’s Ridge. The view you have been waiting for is here! It is beautiful. If you chose this direction through Jewel’s Pass, you can go the “busy way down” and meet back up with Barrier Lake. Maybe even go for a swim?
-
Nihahi Ridge
Length: 10 km
Time Estimate: 3-4 hours (return from the peak); allow 8-10 hours for the ridge traverse
Elevation Gain: 735 m
Peak Elevation: 2530 m
Difficulty: moderate to challenging
This hike starts out in the trees where you get to a beautiful green meadow. Here the trees are more sparse and it feels like a meadow you would see in the Lord of the Rings. Once you get up the ridge there is a path that goes below a cliff. There is a little bit of a scramble after that to get to the top, you need to climb up a small cliff but it’s not very steep and is angled like stairs. You can always turn around at this point and still get good views. If you make it to the peak congratulations!! This should have taken 4 hours or a bit longer if you took your time.
Past the peak, there is also a ridge traverse which takes 8-10 hours as shown above. If you go for the full traverse it can be windy so be cautious and use your best judgement. Awesome views the whole way through!
-
Door Jam Mountain / Loder Peak
Length: 7 km
Time Estimate: 4 hours (return)
Elevation Gain: 603 m to Door Jamb 722 m to Loder Peak
Peak Elevation: 2088 m
This hike can be two peaks or you can just do the first one. Door Jam comes first, the trailhead can be hard to find but you park at the Exshaw concrete plant across the road. After you cross the highway head through the main trail to hike the ridge to the east of the valley away from the plant. If you are hungry once you make it to Door Jam Mountain consider eating before you move on. Loder Peak had a lot of flying bugs but for some reason, Door Jam did not (beginning of June). Door Jam traverses over to Loder Peak which is only about 40 minutes further. On a hot day make sure to bring lots of water! There is not much tree cover on the second half of the hike.
-
Ribbon Falls along the creek to Ribbon Lake
Length: 22 km to falls
Time Estimate: 5-6 hours (return from the falls)
Elevation Gain: 311 m (to the falls)
What will you see on this hike and what is accessible? First Ribbon Creek, then Ribbon Falls, Ribbon Lake, and finally Lillian Lake. Hiking along Ribbon Creek you will not have much elevation gain to the falls. You are also able to camp at Ribbon Falls if you wanted to stay overnight (book your designated site online). If you are planning a day hike this is a great choice as well! If you stay overnight you can use the firepits/wood and make it to Ribbon Lake + Lillian Lake the next day. But for a day hike, you should probably limit yourself to Ribbon Falls (Ribbon Lake if you are feeling ambitious). This will be an extra 5 km from the falls. To get to Ribbon Lake you must also climb a few small cliffs with chains.
Lillian Lake is accessible from another parking lot on the other side. But if you are an experienced hiker you could go all the way through from Ribbon Creek/Falls, past Ribbon/Lillian Lake and to the second parking lot. This would require you to park another car at the end of your trip to get back to the Ribbon Creek lot. There are also campsites at Lillian Lake if you are looking for a great multi-day hike.